Use the AWS CLI to pick the latest Amazon Linux 2023 AMI, launch an EC2 instance with a 100 GB gp3 root volume, and connect over SSH.

Amazon EC2 lets you run virtual servers in the cloud. In this guide, you will:
- Choose the latest Amazon Linux 2023 AMI
- Launch a new EC2 instance
- Set the root EBS volume size to 100 GB (gp3)
- Connect via SSH
Prerequisites:
- AWS CLI installed
- Credentials configured (
aws configure) with permissions to manage EC2
Step 1: Choose the latest Amazon Linux 2023 AMI
Amazon Linux 2 reaches end-of-life in June 2026, so AWS recommends Amazon Linux 2023, supported until March 2028.
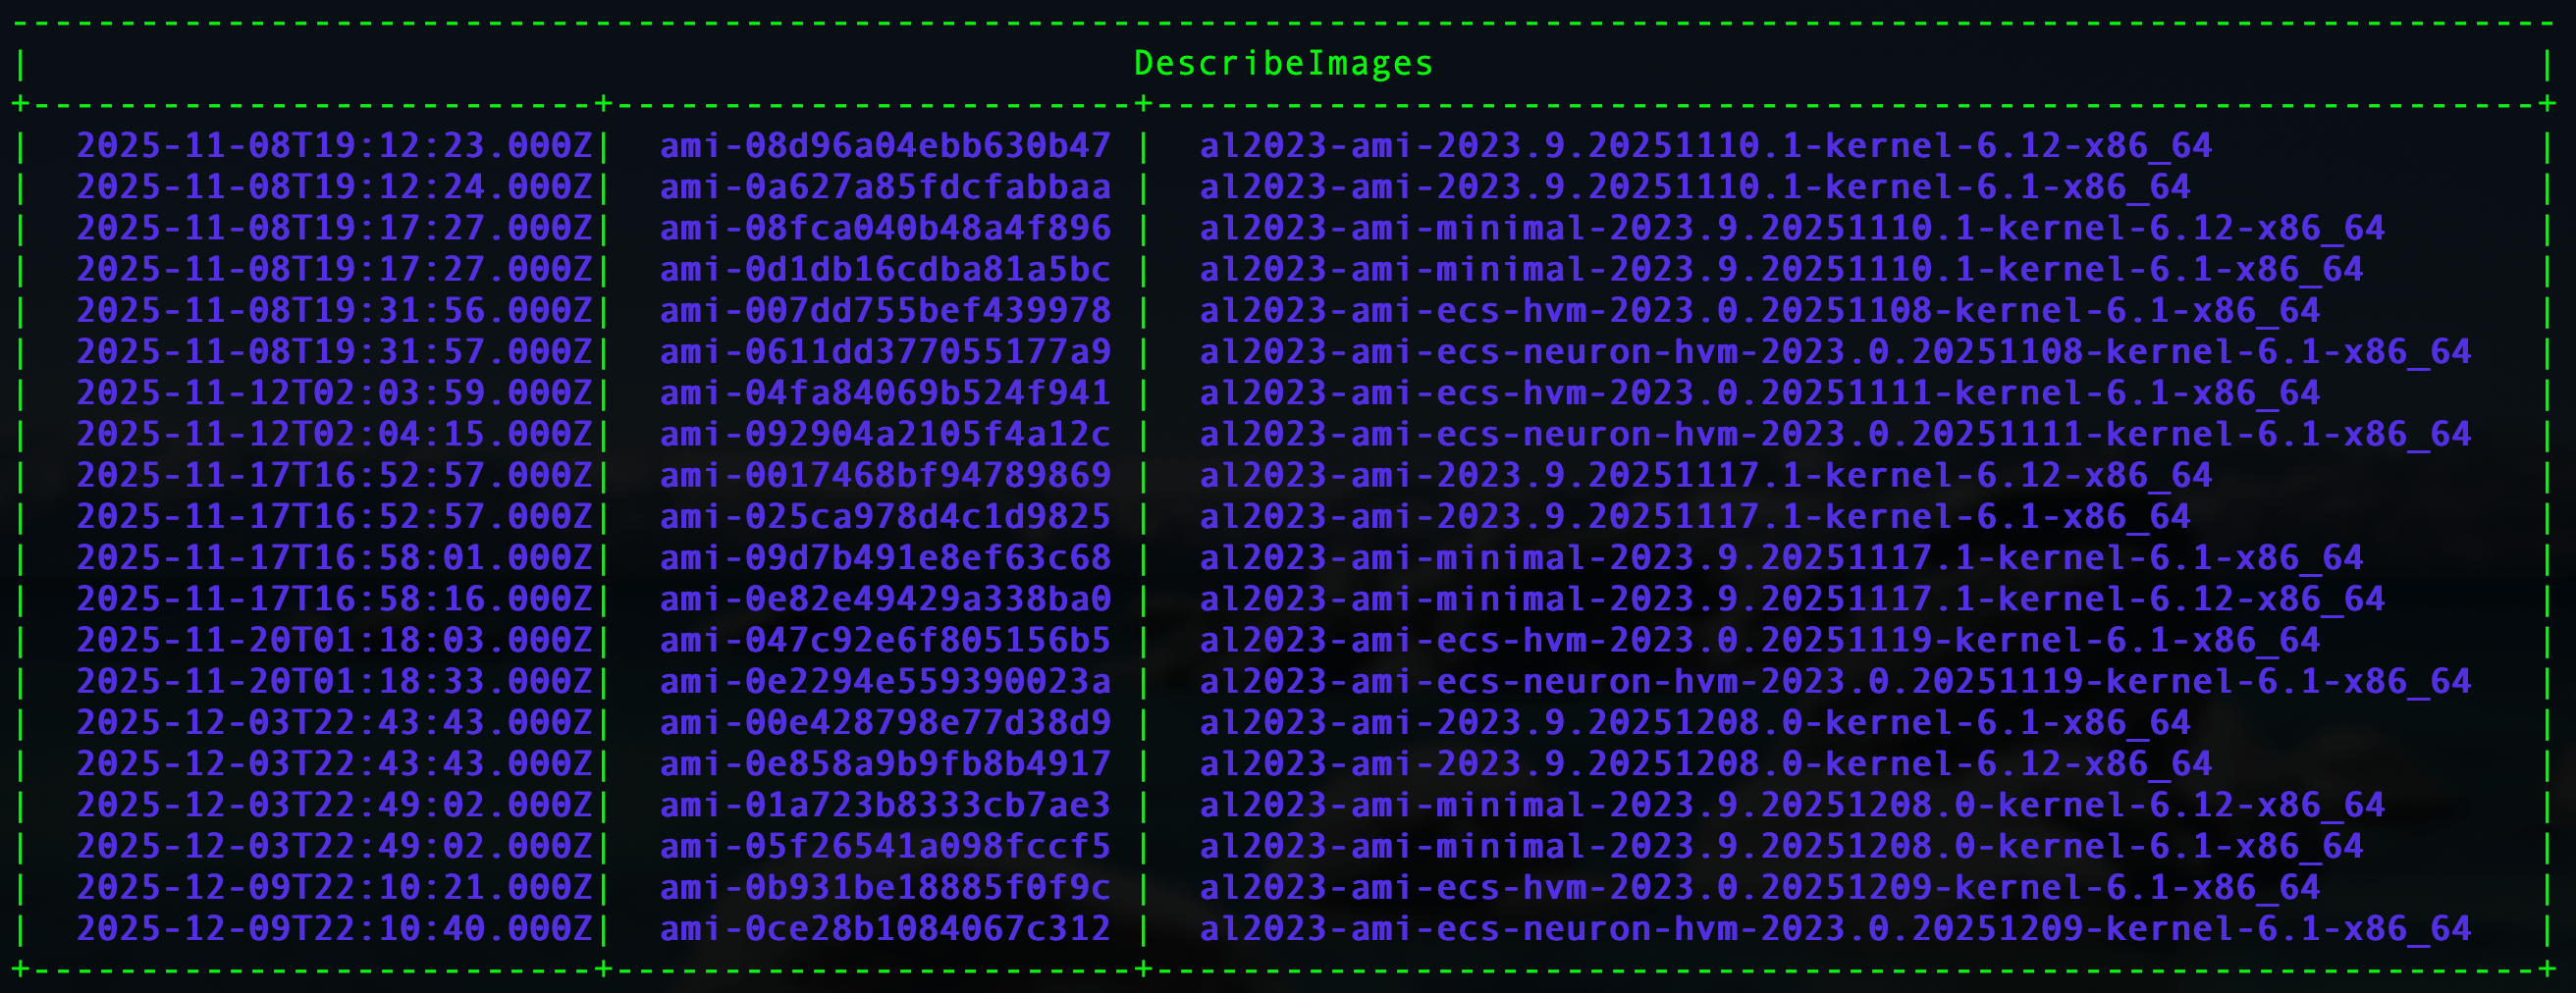
To find the latest AL2023 AMI in your region (us-east-2):
aws ec2 describe-images \
  --owners amazon \
  --filters \
    "Name=name,Values=al2023-ami-*-x86_64" \
    "Name=state,Values=available" \
  --region us-east-2 \
  --query "sort_by(Images,&CreationDate)[-20:].[CreationDate,ImageId,Name]" \
  --output table
Pick the newest AMI (example):
AMI ID: ami-00e428798e77d38d9
Name: al2023-ami-2023.9.20251208.0-kernel-6.1-x86_64
Step 2: Create a key pair
This key pair allows SSH access.
aws ec2 create-key-pair \
  --key-name MyKeyPair \
  --region us-east-2 \
  --query 'KeyMaterial' \
  --output text > MyKeyPair.pem

chmod 400 MyKeyPair.pem
Screenshot: Key pair creation (img/2025-12-17/screenshot-keypair.png)
Step 3: Create a security group
Allow SSH (port 22). For best security, prefer your own IP (for example 1.2.3.4/32) instead of 0.0.0.0/0.
Check if the security group already exists
aws ec2 describe-security-groups \
  --filters "Name=group-name,Values=MySecurityGroup" \
  --query "SecurityGroups[*].GroupId" \
--output textSG_ID=$(aws ec2 create-security-group \
--group-name MySecurityGroup \
--description "Allow SSH" \
--region us-east-2 \
--query 'GroupId' \
--output text)
echo "Created security group: $SG_ID"
aws ec2 authorize-security-group-ingress \
--group-id "$SG_ID" \
--protocol tcp \
--port 22 \
--cidr 0.0.0.0/0 \
--region us-east-2Screenshot: Security group setup (img/2025-12-17/screenshot-security-group.png)
Step 4: Launch the instance with 100 GB of storage
By default, Amazon Linux often uses an ~8 GB root volume. This example sets the root volume to 100 GB using gp3.
INSTANCE_ID=$(aws ec2 run-instances \
  --image-id ami-00e428798e77d38d9 \
  --count 1 \
  --instance-type t3.large \
  --key-name MyKeyPair \
  --security-group-ids "$SG_ID" \
  --block-device-mappings '[{"DeviceName":"/dev/xvda","Ebs":{"VolumeSize":100,"VolumeType":"gp3","DeleteOnTermination":true}}]' \
  --tag-specifications 'ResourceType=instance,Tags=[{Key=Name,Value=al2023-100gb}]' \
  --region us-east-2 \
  --query 'Instances[0].InstanceId' \
  --output text)

echo "Created instance: $INSTANCE_ID"

aws ec2 wait instance-running \
  --instance-ids "$INSTANCE_ID" \
  --region us-east-2
Explanation:
--block-device-mappingsoverrides the default root volume size to 100 GB.gp3is cost-effective and high-performance.
Step 5: Get the public IP and connect via SSH
PUBLIC_IP=$(aws ec2 describe-instances \
  --region us-east-2 \
  --instance-ids "$INSTANCE_ID" \
  --query "Reservations[0].Instances[0].PublicIpAddress" \
  --output text)

echo "Public IP: $PUBLIC_IP"

ssh -i MyKeyPair.pem ec2-user@"$PUBLIC_IP"
Optional: Create a permanent public IP (Elastic IP)
Allocate an Elastic IP:
ALLOCATION_ID=$(aws ec2 allocate-address \
  --region us-east-2 \
  --query 'AllocationId' \
  --output text)

echo "Elastic IP allocation id: $ALLOCATION_ID"
Associate the Elastic IP to your instance:
aws ec2 associate-address \
    --instance-id "$INSTANCE_ID" \
    --allocation-id "$ALLOCATION_ID" \
    --region us-east-2
Verify Elastic IPs in the region:
aws ec2 describe-addresses \
  --region us-east-2

aws ec2 describe-addresses \
  --allocation-ids "$ALLOCATION_ID" \
  --region us-east-2
Step 6: Verify storage
Once inside the instance:
lsblk

df -h
If you do not see the expected size yet, reboot once and check again. If it is still not expanded, you may need to grow the partition/filesystem (the exact steps depend on the filesystem).
Step 7: Install and configure Nginx
After launching your instance, you can install Nginx to serve web content.
For Amazon Linux 2023:
sudo dnf update -y
sudo dnf install -y nginx
For Amazon Linux 2:
sudo yum update -y
sudo amazon-linux-extras enable nginx1
sudo yum install -y nginx
Start and enable Nginx:
sudo systemctl start nginx
sudo systemctl enable nginx
Verify Nginx status:
sudo systemctl status nginxWhy choose Amazon Linux 2023?
- Long-term support until 2028
- Kernel 6.x for better performance and security
- Uses the
dnfpackage manager (modern replacement foryum)
Optional enhancements
- Attach an Elastic IP so your server keeps the same public IP address.
- Use AWS Systems Manager Session Manager to access the instance without opening inbound SSH.
- Install your stack (Python, Docker, Nginx) using
dnf. - If you’re planning to run Kubernetes, see Kubernetes Cluster Setup on AWS EKS.
Happy cloud building!
FAQ
- Does this create an extra EBS volume or just resize the root volume?
- The block device mapping shown resizes the root EBS volume (from the default ~8 GB to 100 GB). If you want a second data volume, attach another mapping (for example /dev/sdf) or use the console to attach an additional EBS volume.
- What username should I use to SSH into Amazon Linux 2023?
- Use the ec2-user account: ssh -i <key>.pem ec2-user@<public-ip>.
- Why does df -h sometimes still show ~8 GB after using a bigger volume?
- The EBS volume size and the filesystem size are related but not always identical. Cloud-init usually grows the partition and filesystem on first boot, but if it does not, you may need to grow the partition and filesystem manually.
Welcome to The infinite monkey theorem
Somewhere a monkey just typed Shakespeare in TypeScript. Be the first to read the masterpieces (and the hilarious misfires) landing on the blog.